
Free Rental Inspection Checklist for Landlords and Property Managers
Every solid inspection, whether move-in, routine or move-out, is a disciplined walk through the unit with a good list. This free rental inspection checklist gives you that list, room by room, plus the whole-property items (meters, detectors, keys) that get forgotten most often and disputed most expensively.
Download the checklist (PDF)Three printable pages: the room-by-room list with checkboxes, the whole-property items and a notes sheet. No email required.
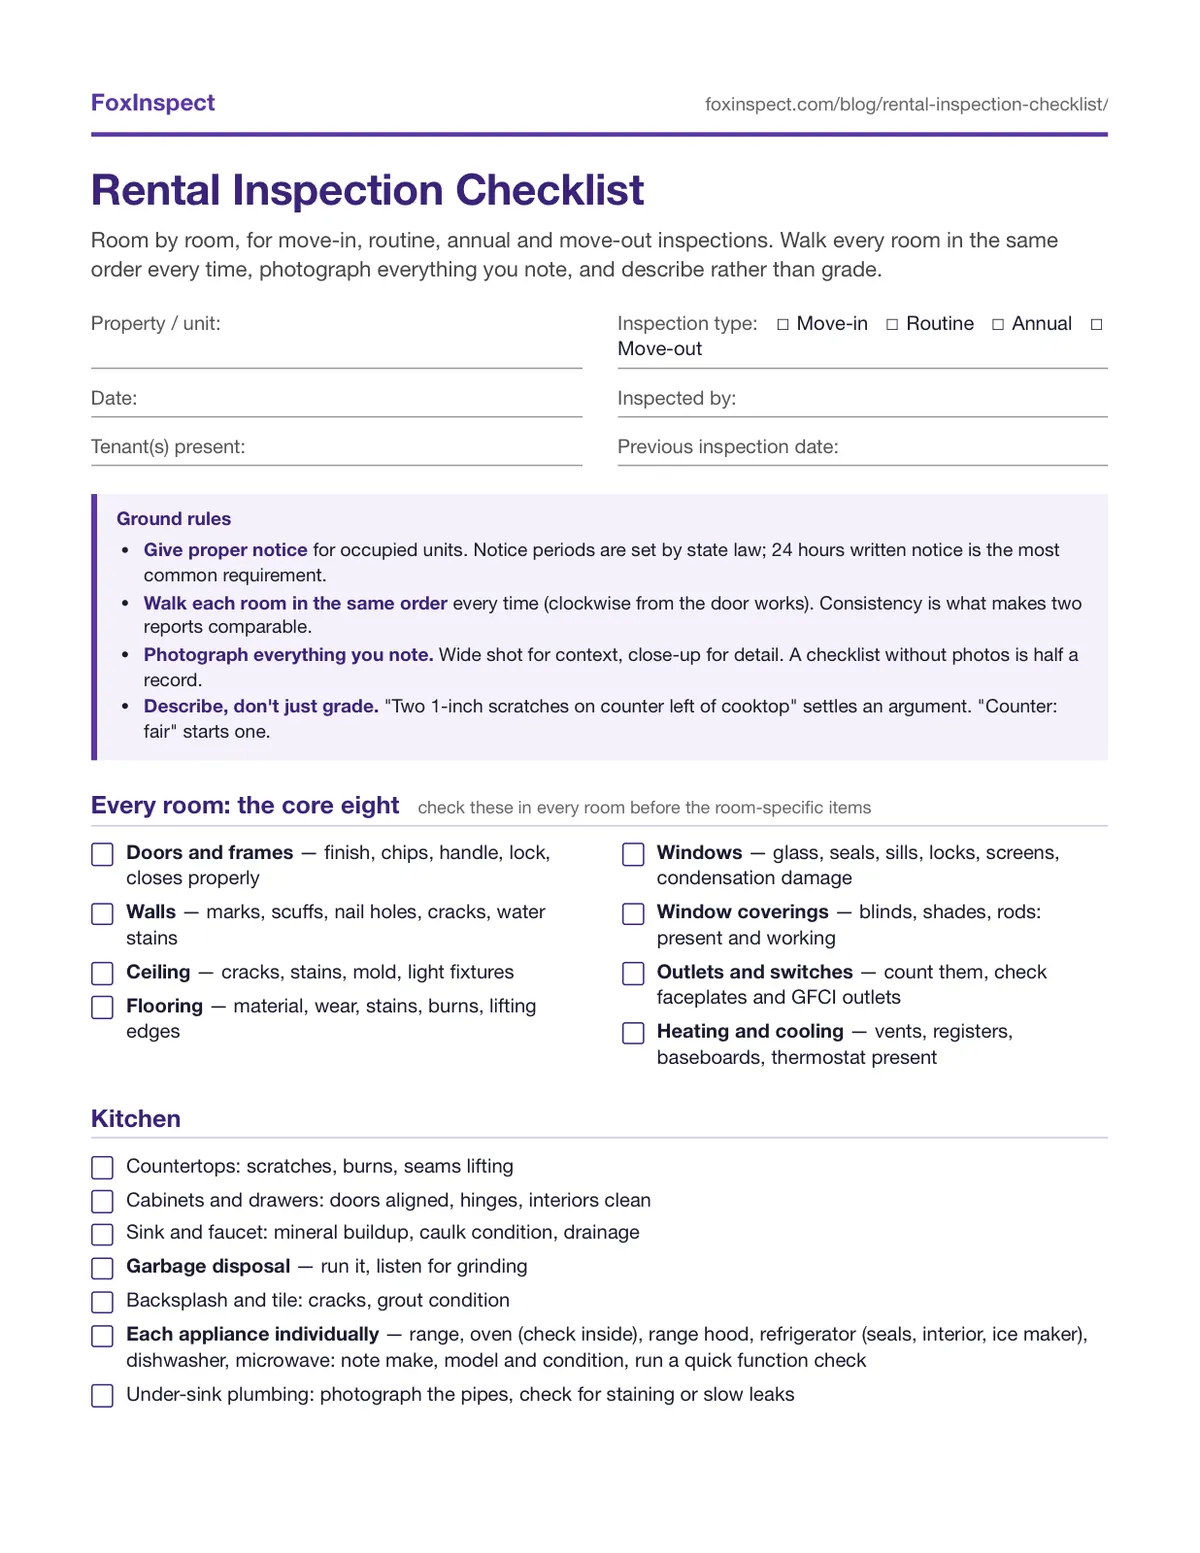
Four ways to use it, each covered in its own section below:
- Move-in: the full walkthrough that becomes your condition report
- Routine: the lighter version for a visit mid-lease
- Annual: the deeper once-a-year check on systems and structure
- Move-out: the identical repeat of move-in, for comparison
Before you start: the ground rules
- Give proper notice for occupied units. Notice periods are set by state law. 24 hours written notice is the most common requirement, but confirm your state’s rule and put it in the lease.
- Walk each room in the same order every time (clockwise from the door works). Consistency is what makes two reports comparable.
- Photograph everything you note. Wide shot for context, close-up for detail. A checklist without photos is half a record.
- Describe what you see. “Two 1-inch scratches on counter left of cooktop” will settle an argument. “Counter: fair” will start one.
Every room: the core eight
Check these eight in every room before the room-specific items:
- Doors and frames: finish, chips, handle, lock, closes properly
- Walls: marks, scuffs, nail holes, cracks, water stains
- Ceiling: cracks, stains, mold, light fixtures
- Flooring: material, wear, stains, burns, lifting edges
- Windows: glass, seals, sills, locks, screens, condensation damage
- Window coverings: blinds, shades, rods present and working
- Outlets and switches: count them, check faceplates and GFCI outlets
- Heating and cooling: vents, registers, baseboards, thermostat present
Kitchen
- Countertops: scratches, burns, seams lifting
- Cabinets and drawers: doors aligned, hinges, interiors clean
- Sink and faucet: mineral buildup, caulk condition, drainage
- Garbage disposal: run it, listen for grinding
- Backsplash and tile: cracks, grout condition
- Each appliance individually: range, oven (check inside), range hood, refrigerator (seals, interior, ice maker), dishwasher, microwave. Note make, model and condition, and run a quick function check where practical.
- Under-sink plumbing: photograph the pipes, check for staining or slow leaks
Bathrooms
- Tub and shower: surface condition, door or curtain rod, shower head
- Caulk and grout: mold and gaps here become leak disputes later
- Toilet: flush, seat, base seal, any rocking
- Sink and faucet: chips, mineral buildup, drainage speed
- Exhaust fan working (run it)
- Towel bars, mirror, medicine cabinet condition
- Any sign of leaks under fixtures: photograph the plumbing
Bedrooms
- Core eight (above)
- Closets: doors, rods, shelving
- Furnished units: bed frame, mattress (condition and staining, both sides), other furniture itemized with photographs
- Egress window operable where the room is used as a bedroom
Living areas, hallways and stairs
- Core eight (above)
- Stairs: tread condition, handrail secure, railing intact
- Furnished units: sofas (cushions, frames, staining), tables, shelving, each itemized
- Smoke detector on every level: test it and record the date
Exterior (if applicable)
- Yard: lawn, beds, fences, gates. State maintenance expectations in writing.
- Shed or garage: roof, door, opener, contents if provided
- Gutters, downspouts and visible siding condition
- Driveway, walkways, steps: trip hazards
- Trash and recycling containers: number and condition
- Propane or oil tank, external meters, hose bibs
Whole-property essentials
These take five minutes and decide a disproportionate share of disputes:
- Meter readings: gas, electric, water. Photograph the meter faces.
- Smoke detectors on every level and CO detectors near sleeping areas and any fuel-burning appliance. Test each one and record it. Requirements are state-specific and several states require ten-year sealed batteries.
- Keys, fobs and remotes: count everything issued and photograph it together on a labeled ring
- Furnace and water heater: brief function check, note the service tag date and the water heater’s age
- Cleanliness: state the standard explicitly and photograph it. If the unit was professionally cleaned, keep the receipt with the report.
- Manuals, filters and compliance documents: note what was left with the tenant, including any required lead-paint disclosure for pre-1978 housing
Move-in inspection
The move-in walkthrough is the one that matters most, because everything later is measured against it. Work through every section above, photograph as you go, and turn the result into a signed move-in condition report. Get the tenant’s signature on it, give them a copy, and store it somewhere you will still be able to find it two years from now.
The full method (timing, sequence and the comparison that follows) is in our move-in vs move-out guide. If you need the document itself rather than the process, use the move-in/move-out inspection form.
Routine inspection
Quarterly or six-monthly visits do not need a full contents check. Focus on:
- Water damage, mold or condensation (photograph any)
- Leaks under sinks, around tubs, at supply valves
- Detector tests
- HVAC filter condition. A clogged filter is the cheapest problem you will ever find and one of the most expensive to ignore.
- Yard and exterior upkeep
- Unauthorized occupants, pets or alterations
- Maintenance the tenant has not reported, and anything they raise
Keep the record even when everything is fine. A trail of “no issues” reports is persuasive evidence of a monitored, well-managed property.
Annual inspection
Once a year, go deeper than the routine visit and look at the systems and structure rather than the surfaces:
- Roof and gutters from ground level: missing shingles, sagging, debris
- Water heater: age, corrosion at fittings, pressure relief valve, and whether it is approaching replacement
- Furnace or HVAC: service record, condenser coils, refrigerant lines
- Plumbing: supply lines under every sink, toilet shutoffs, water pressure, any slow drain that has been slowly worsening
- Electrical: panel condition and labeling, GFCI test at every wet location, any outlet that has become loose
- Exterior envelope: caulking around windows and doors, siding, paint, grading and drainage away from the foundation
- Detectors: replace batteries, and replace any unit older than ten years
An annual inspection is also the natural moment to plan capital work. An appliance you flag as “near end of life” this year is a scheduled replacement next year instead of an emergency callout.
Move-out inspection
Repeat the move-in walkthrough exactly, in the same order, with the same photographs. Do it on the day the lease ends, after the tenant’s belongings are out and before any cleaner or contractor enters. Every day of delay and every third party through the door weakens the link between the tenant and anything you find.
What you produce here becomes the evidence behind your security deposit disposition, the itemized statement of what you are deducting and why. That statement is only as good as the comparison behind it. For the timing, the pre-move-out walkthrough and the tenant rights that apply at this stage, see the move-out inspection guide.
Triaging what you find
A completed checklist is only useful if findings turn into decisions. Sort every issue into one of three buckets and mark it on the record:
- Urgent: safety or escalating damage, such as suspected gas odors, exposed wiring, active leaks, failed detectors, or signs of pests. Report the same day and instruct a contractor immediately. Note the time you reported it. That timestamp is your defense if the issue later grows into an insurance claim.
- Routine: maintenance that can wait for scheduling, such as dripping faucets, a sticking door, cracked caulk, or loose fence panels. Batch these into one contractor visit and tell the tenant the plan. Silence after an inspection is how cooperation with the next visit erodes.
- Monitor: early observations not worth action yet, such as light condensation marks, hairline drywall cracks, or a worn but working appliance. Photograph, date, and compare at the next visit. A “monitor” trail showing an issue stable across three inspections is itself evidence of diligent management.
Seasonal additions worth bolting on
On fall and winter visits, check for condensation and mold risk (window reveals, exterior-wall corners, behind furniture), clear gutters and downspouts before heavy rain, start the furnace and change the filter, look at exposed pipe insulation and freeze risk, and remind the tenant about ventilation.
On spring and summer visits, check the yard while growth is visible, exterior paint and fencing after winter, AC startup and the condensate drain, water staining from the freeze months, and foundation vents or screens blocked over winter.
Running this checklist digitally
Paper checklists work, but they have a habit of divorcing the photos from the notes: two hundred images on a phone, none labeled. Purpose-built tools bind each photo to the room and item as you go. FoxInspect structures this exact checklist as a guided browser flow the tenant can complete themselves from a link, with no app download, which is particularly useful for remote or self-service move-ins where sending someone out is not practical. Our tenant self-inspection page covers how that works and when an in-person visit is still the better call. You can also see all the features or start free.
Using the checklist over a tenancy
The units that sail through deposit release are the ones inspected the same way, in the same order, with photographs, every time. Save this checklist, walk it in full at move-in, use the light version routinely, go deeper once a year, and repeat it in full at move-out.
Frequently asked questions
How often should I inspect a rental property?
A common schedule is a first visit around three months into a new lease, then every six months, plus a full move-in and move-out inspection at each end. Notice requirements are set by state law rather than by any national rule. 24 hours is typical, California requires 24 hours for most entries, and some states specify only 'reasonable' notice. Check your own state's landlord-tenant statute and write the notice period into the lease.
Can I use the same checklist for move-in and move-out?
You should, and that is the point of using a checklist at all. A deduction is only defensible if you can show the difference between two records, so an identical structure at both ends of the lease makes changes obvious and disputes short. Routine inspections in between can use a lighter version focused on condition, safety and maintenance rather than a full contents check.
Do I need photographs as well as the checklist?
Yes. A checked box saying 'good condition' carries very little weight on its own. Pair every notable item with a date-stamped photograph, a wide shot for context and a close-up for detail. For a typical two-bedroom unit, expect 30 to 80 photographs at move-in and a similar number at move-out.
What is the difference between an inspection checklist and a condition report?
The checklist is the working tool you carry through the unit; the move-in condition report is the finished document produced from it, including descriptions, photographs and the tenant's signature. Routine inspections use the checklist without producing a full condition report.
Does the tenant have to be present for the inspection?
Not usually, and for routine inspections it is often easier if they are not. Move-out is the exception worth pushing for: a tenant who walks the unit with you can agree issues on the spot, which avoids most disputes. Several states, California among them, give tenants the right to request a pre-move-out inspection so they have a chance to fix problems before you assess the deposit.